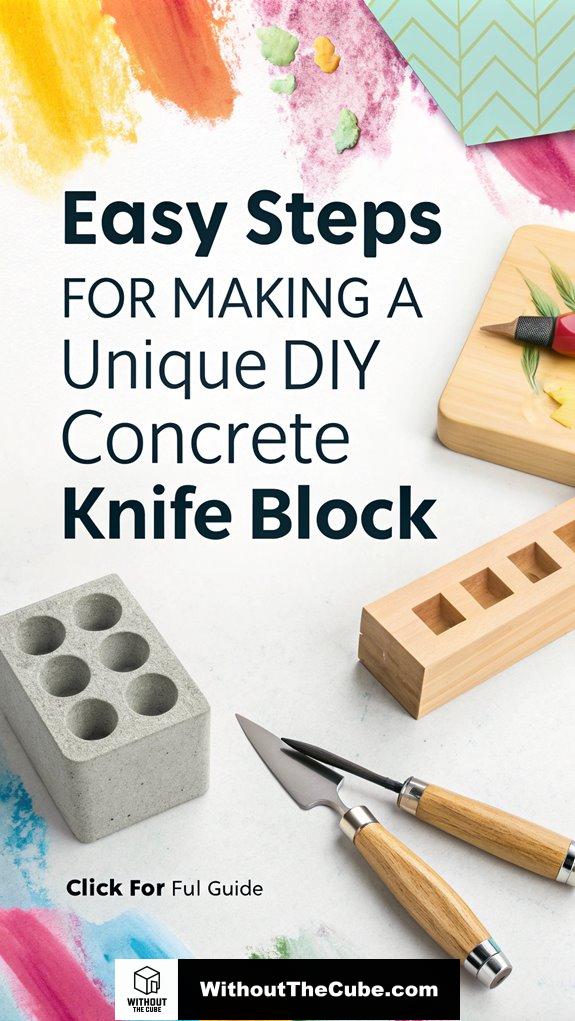
Ready to elevate your kitchen game with a DIY concrete knife block? Trust me, it’s easier than it sounds!
First, picture this: a sleek concrete masterpiece paired with warm wood accents. Sounds fancy, right?
I once attempted a similar project after binge-watching home improvement shows. Spoiler alert: it didn’t go as planned!
After a concrete mix that resembled cookie dough, I poured it into a silicone mold (the magic ingredient). Once it set, I sanded it down, because who doesn’t love a smooth finish? A coat of oil-based polyurethane for protection, and voilà!
Creating this blog, Without The Cube, is my way of promoting superior interior design. So, why not join me in crafting something unique for your kitchen?
—
A Concrete Lesson in Design: My Client’s Knife Block Journey
I had a client who needed a knife block that wasn’t just functional but a real conversation starter. After discussing textures and finishes, we decided on a concrete design with playful stamped patterns. The look on their face when they saw it—priceless!
It was a perfect blend of modern and rustic, just like they wanted. This experience taught me the importance of balancing aesthetics with practicality. After all, who says a knife block can’t be a work of art?
Key Takeaways
- Select contrasting materials like concrete and warm woods for a visually appealing and durable knife block design.
- Prepare molds with smooth shapes and reliable release agents to ensure easy concrete pouring and removal.
- Follow precise concrete mixing ratios and techniques to achieve a strong, consistent mix for your knife block.
- Pour the concrete into the mold, vibrating to remove air bubbles, and cover during curing for optimal strength.
- Sand the surfaces and apply protective finishes to enhance durability and achieve a professional look.
Design and Plan Your Block

When I’m designing a concrete knife block, I start by determining the materials I’ll need. Mixing concrete’s industrial vibe with warm woods like walnut or bamboo creates a striking contrast that enhances the overall design. It’s important to consider that a durable thermo beech wood insert can accommodate multiple knives and even scissors. Unique concrete knife blocks are not only functional but also serve as a stylish centerpiece in your kitchen. Think about how many knives you’ve got—do you need extra slots for scissors?
Choosing the right material selection makes all the difference.
Let’s create something fabulous together!
Prepare the Mold

Creating a solid mold is essential for your concrete knife block project.
To guarantee success, recall these key points:
- Choose durable materials like wood or silicone.
- Design a smooth shape for easy pouring.
- Apply a reliable release agent, like Pol-Ease 230.
- Secure your mold to prevent movement.
In addition, ensure that your mold incorporates tapered edges to facilitate draft for easy removal. A mold that is well-constructed can greatly influence the overall durability of your project and reduce the likelihood of cracks.
With proper mold durability, your masterpiece will be ready for a flawless finish!
Mix the Concrete

Mixing the concrete is a crucial step that can make or break your knife block project.
I start with precise mix ratios—1 part sand, 1 part Portland cement, and 1 part gravel. Proper ratios of components are essential for durable concrete, so it’s important to get the mix right. using quality materials can significantly impact the final strength and appearance of your project.
Then, I use some fun mixing techniques, like creating a little well for water. Aim for that cookie dough-like consistency, and trust me, your block will be a hit!
Pour the Concrete

With the concrete mix ready, it’s time to pour it into the mould.
I like to do it in sections for better control, ensuring the concrete consistency is just right. Don’t forget to vibrate the mould; air bubbles can ruin your block!
Here’s what I keep in mind:
- Pour steadily
- Fill to the top
- Level it off
- Smooth the surface
Incorporating stylish concrete knife blocks into your kitchen design can enhance both functionality and aesthetics.
Let’s create something beautiful!
Allow to Set

After pouring the concrete into the mould, it’s essential to allow it to set properly.
Use curing techniques like covering it with damp blankets to maintain moisture control.
Keep an eye on temperature, aiming for that sweet spot around 68°F.
Recall, no peeking until it’s strong enough—give it at least seven days.
Patience is key, my friend! proper curing techniques can significantly improve the strength and durability of your concrete piece.
Remove From Mold

Once the concrete has cured for at least seven days, I’m ready to remove it from the mold.
First, I make sure to follow these simple steps for successful demolding techniques:
- Check mold preparation for cleanliness.
- Remove all pins and wedges.
- Gently open the mold.
- Handle the demolded block with care.
Now, I can’t wait to see my creation!
Create Knife Slots

Creating knife slots in your DIY concrete knife block is an exciting step that adds both functionality and style.
I mean, who doesn’t love a well-organized kitchen? For knife safety, measure each knife’s length and width, keeping them spaced just right.
Plus, think about adding slots for scissors or a sharpening steel. Trust me, a little planning makes all the difference in slot organization! Incorporating stylish concrete storage solutions can elevate the overall aesthetic of your kitchen while maintaining efficiency.
Let’s get creative together!
Sand and Finish

Sanding and finishing your DIY concrete knife block is essential for achieving a sleek, professional look. Trust me, you’ll love the transformation! Here are some quick tips for effective surface preparation and sanding techniques:
- Assess and fill any imperfections
- Start with coarse grit sandpaper
- Clean between sanding rounds
- Use protective gear
Concrete surfaces can be styling concepts aesthetics that enhance your kitchen’s overall design. Get ready to impress with your stunning creation!
Apply Final Touches

As you wrap up your DIY concrete knife block project, applying the final touches is essential for elevating its appearance and durability.
I recommend three coats of oil-based polyurethane for final sealing.
Don’t forget to sand between applications!
For some extra flair, consider aesthetic coatings that protect and beautify.
Trust me, these enhancements make a stunning difference—your kitchen will thank you!
Use Silicone Molds for Shaping

To achieve a precise shape for your concrete knife block, using silicone molds is an excellent approach.
- Choose the right silicone types for durability.
- Guarantee proper mold maintenance to prolong their life.
- Don’t skimp on the release agent for easy removal.
- Always seal those edges to avoid leaks!
Trust me, your creativity will shine through with this innovative technique!
Textured Surface Finish

Once you’ve shaped your concrete knife block using silicone molds, the next step is to contemplate the surface finish.
Think about using texture techniques like stamping or exposed aggregate to bring those surface aesthetics to life!
These finishes not only look fabulous but also add a unique touch. Plus, they’re super durable.
Ready to make your knife block a standout piece? Let’s get creative!
Summary
I’ve crafted my own concrete knife block, and it’s a practical addition to my kitchen. Making it from scratch allowed me to personalize my space and enhance organization.
It’s rewarding to create something useful and stylish.
I’d love to hear about your DIY experiences. What projects have you tackled?
If you enjoyed this post, please share it on social media to help spread the word about Without The Cube.
Leave a Reply