
Creating a decorative concrete tray? Trust me, it’s way easier than it sounds!
I once tried to impress my friends with a “Pinterest-worthy” project that turned into a comedy of errors.
So, I gathered quick-drying cement, a silicone mold, and water mixed at a 2:1 ratio. Yes, I felt like a mad scientist!
After mixing until it resembled cake batter (minus the deliciousness), I poured it into the mold—after spraying it with cooking spray, of course. Cue the air bubbles dancing around!
A week later, I smoothed the edges and added a pop of color. My friends were floored!
I started my blog, Without The Cube, to share my journey in promoting superior interior design. Who knew concrete could be so chic, right?
—
Client Project: Transforming Spaces with Concrete
I once worked with a client who wanted to revamp their dull living room. We decided on a custom concrete coffee table to anchor the space.
As we mixed the cement and poured it into the mold, I just knew this would be a game-changer.
When it was done, the concrete table became the centerpiece of their home. It turned out to be a conversation starter—who knew a little gray could spark so much joy?
This experience taught me that even the simplest materials can create stunning designs.
Key Takeaways
- Gather materials like quick-drying cement, silicone molds, and cooking spray for easy release before starting your project.
- Mix cement with water at a 4:1 ratio until it resembles cake batter for optimal pouring consistency.
- Pour the mixture into the mold, filling it about ¾ full, and gently tap or vibrate to eliminate air bubbles.
- Allow the concrete to cure for at least 7 days, ensuring it remains moist to achieve full strength.
- Enhance your tray’s design by adding natural elements like pebbles, moss, or candles for a decorative touch.
Overview of Materials

When it comes to creating a DIY decorative concrete tray, having the right materials at hand is essential. You don’t want to be scrambling for supplies halfway through, right?
First, grab some quick-drying cement powder—trust me, it’ll save you time. You’ll also need a mold; silicone molds work wonders, but cake pans can double as trays too. This project is suitable for beginners and experienced crafters alike, making it accessible for everyone, using stylish concrete trays can enhance your home decor while showcasing your creativity.
Don’t forget water—mix it with the cement at a 2:1 ratio for the perfect consistency.
Want a pop of color? Toss in some acrylic paint or powdered dye. And let’s not neglect sealers; a food-safe option will protect your masterpiece.
Now, who’s excited to plunge into this? Your stylish tray is just around the corner, and we created this blog Without The Cube to help you shine!
Preparing Your Mold

Creating the perfect mold is essential for your decorative concrete tray. Trust me, you want a smooth and even base to avoid any imperfections that could ruin your masterpiece. A well-prepared mold will help ensure the final product has a professional finish.
I like using foam insulation board or even a sanded plywood base. Grab a disposable blade knife and get cutting!
For the sides, I’ve found PVC molding works wonders. Just pre-drill holes and secure them with screws—easy peasy!
Don’t forget to spray the mold with cooking spray to make removal a breeze.
Oh, and if you want handles, cut some dowel pieces and secure them in the cement after pouring. It’s crucial to ensure a level work surface to achieve the best results!
Want a unique design? Place a smaller object inside the mold. By incorporating different materials, you can achieve a one-of-a-kind texture that makes your trays shine!
Mixing the Concrete

Now that your mold is ready, it’s time to mix the concrete for your decorative tray.
I usually stick to a 4:1 cement-to-water ratio—trust me, it works like a charm! Achieving the right ratio is crucial for ensuring durability and a smooth finish.
Aim for a consistency that feels like cake batter, because who doesn’t love cake?
If you’re feeling adventurous, sprinkle in some powdered pigments, but keep in mind, less is more; keep it under 5% of your total mix.
Grab a sturdy stir stick or a bucket with a handle and mix until everything’s lump-free. Remember to use quick-setting cement for durability and a smooth finish.
And hey, if you notice air bubbles, don’t panic!
Just give the table a gentle tap and watch them escape.
Let’s get mixing and bring your creative vision to life!
Pouring the Concrete

Pouring the concrete is the moment your decorative tray starts to take shape.
Once you’ve got your mold ready—be it a cake pan or a funky plastic tray—spray it with cooking spray for a smooth release.
Now, let’s talk consistency. Your concrete should be as smooth as cake batter—no lumps allowed! The durable material used in your tray is ideal for heavy use and weather resistance. Properly mixed concrete ensures a stronger structure and enhances the longevity of your tray.
Carefully pour the mixture, filling the mold about ¾ of the way.
Want to impress your friends with a flawless finish? Tap the mold or use a vibrating tool to eliminate those pesky air bubbles.
And if you’re adding handles, pop them in right after pouring.
Trust me, this step is where the magic happens—your tray is on its way to being a showstopper!
Ready to take your creativity to the next level? Let’s do this!
Curing Process

Once your concrete tray is poured, the curing process begins, and it’s essential for achieving the strength and durability you want.
Think of curing as giving your tray a cozy blanket—moisture is key!
You’ll want to keep that concrete moist for at least 7 days, especially if it’s warm outside. I usually just leave the forms on; they help trap moisture like a pro. Remember, minimum curing time is crucial for ensuring the concrete achieves its full strength. the hydration process during curing allows the concrete to reach its optimal hardness.
If it’s really hot, I might mist the surface to avoid any drama like cracks.
Oh, and if you live in a chilly place, don’t worry! Insulated blankets work wonders.
Just keep in mind, curing isn’t just a waiting game; it’s the secret sauce to making your decorative tray a true masterpiece.
Ready to rock this? Let’s do it!
Removing From Mold
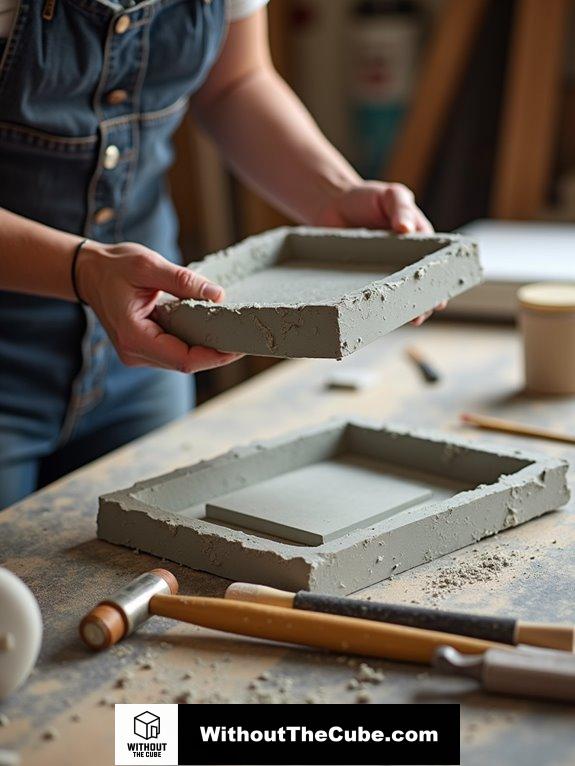
Removing your concrete tray from the mold can feel like unwrapping a gift—you’re excited to see the final product!
Just keep in mind to take it slow, or you might end up with a surprise you didn’t want.
Here’s how to do it right:
- Wait until the concrete is completely dry. Patience, my friend!
- Unscrew the base first, then the sides, like a gentle puzzle.
- Tap around the tray to help release it from the mold—no need for a sledgehammer!
- Use a sanding block to handle any rough edges afterwards.
- Be careful while lifting it out; you don’t want a shattered masterpiece.
- using a release agent can help prevent sticking and make the removal process smoother.
Trust me, the thrill of the reveal is worth it. Happy crafting!
Smoothing and Finishing

Smoothing and finishing your concrete tray is where the real magic happens.
First, grab some coarse-grit sandpaper to start the smoothing process—think of it like giving your tray a spa day! Once you’ve tackled the rough spots, switch to finer-grit sandpaper for that silky finish.
Oh, and don’t forget a sanding block; it’s your best friend for those pesky edges and corners. If you want to speed things up, an electric sander is a game changer. you can create multiple pieces from a single bag of concrete mix, making this project even more rewarding.
Now, let’s not forget about those sneaky air bubbles! A gentle tap or a vibrating table can help them escape.
Creative Tips and Variations
After you’ve perfected the smoothing and finishing of your concrete tray, it’s time to release your creativity.
Let’s make something truly unique!
Here are some fun ideas to spark your imagination:
- Use flexible plastic bowls for funky shapes.
- Embed mirrors in your concrete for a dazzling tray.
- Add color with acrylic paint or pigments for a pop.
- Insert handles before it sets for a practical touch.
- Experiment with textures for a one-of-a-kind look.
- consider using quickset concrete to ensure your project sets quickly and efficiently.
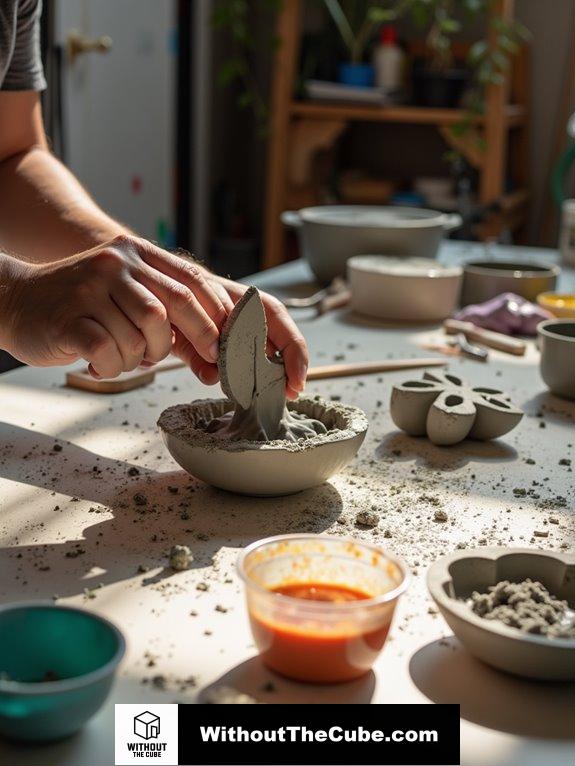
Avoid Air Bubbles in Concrete

When you’re working with concrete for your decorative tray, avoiding air bubbles is essential for a smooth finish. Trust me, those little pockets of air can ruin your masterpiece!
To keep them at bay, I like to shake or gently tap the mold. You can even use a vibrating tool, like a hand sander—just don’t get too crazy, or you’ll have more than bubbles to worry about!
Pouring slowly is key; think of it like pouring syrup on pancakes. Let it settle for a few minutes before doing any shaking.
Oh, and a mallet works wonders too! Just a gentle tap on the table can release those pesky bubbles.
Recall, the right consistency, like thick cake batter, can work magic. Happy crafting!
Accent With Natural Elements
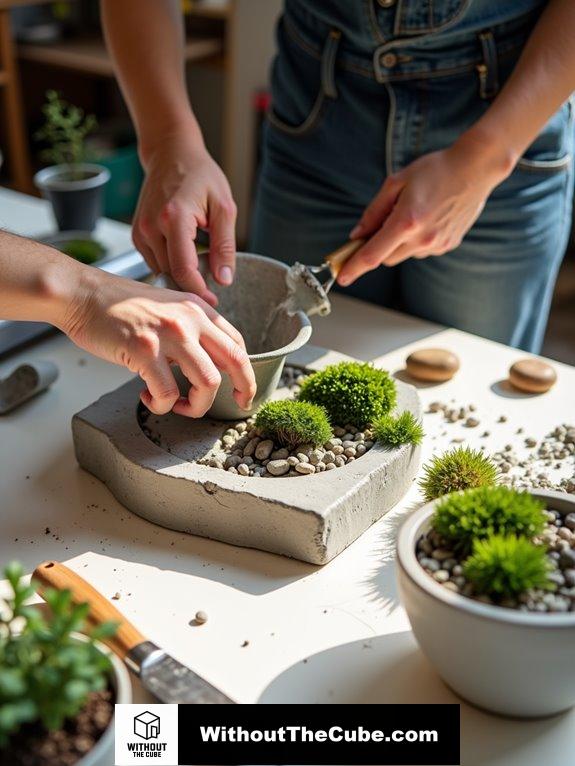
To enhance your decorative concrete tray, I love incorporating natural elements that bring warmth and texture to the design.
Think about adding a touch of the outdoors to your space with:
- Pebbles for that earthy vibe
- Lush moss for texture
- Small potted plants that breathe life
- Wooden accents for a snazzy contrast
- Candles for a cozy glow
These elements can turn your tray into a stunning centerpiece.
Picture it on your coffee table, adorned with candles or a cute vase. You could even use it for serving drinks at a gathering, adding a fresh touch to your entertaining.
Let’s face it, who doesn’t love a bit of nature indoors? It’s a winning combo, right?
Summary
I’m excited to create my decorative concrete tray. It’s straightforward and allows me to express my style with colors and decorations. I can’t wait to see the final product and share it with others.
I’d love to hear about your experiences making decorative concrete trays. What tips or ideas do you have to share?
If you enjoyed this post, please share it on social media to help us reach more people at Without The Cube.
Leave a Reply