Ever tried making your own concrete planter? I did, and let me tell you, it’s both messy and satisfying!
First, I grabbed some plastic containers for molds.
I mixed up dry cement and sand, adding just enough water to get that perfect oatmeal vibe—seriously, who doesn’t love oatmeal?
After pouring the mix, I added a smaller mold with rocks to keep things grounded (pun intended).
Eighteen hours later, I sanded it down and sealed it—what a transformation! I created this blog, Without The Cube, to share my passion for superior interior design.
It’s amazing how a little DIY can spark such joy, right?
—
A Client’s Concrete Adventure: Transforming Spaces
I once worked with a client who wanted to bring some life into her drab apartment. We decided on a concrete planter to house her beloved succulents. It was a game-changer! The rich texture paired beautifully with her modern decor, and she was thrilled with the result. From that project, I learned that even small changes can elevate a space—who knew concrete could be so chic?
Key Takeaways
- Prepare molds using plastic containers or silicone, ensuring they are tightly sealed and greased for easy removal.
- Mix a concrete blend of 2 parts dry cement to 3 parts sand, adding water for a thick oatmeal consistency.
- Pour the concrete into the mold and insert a smaller, greased mold to create a planter shape with drainage holes.
- Allow the concrete to cure undisturbed for at least 18 hours, with additional time for larger pots to ensure proper setting.
- Finish the planter by sanding for a smooth surface and applying a concrete sealer to protect and enhance its appearance.
Preparation of Molds

Preparing molds for your DIY concrete planter is an essential step that sets the foundation for your project. Trust me, you don’t want to skip this part!
You can use plastic containers, melamine, or even cardboard—whatever you have lying around. Just make sure to seal those edges tight!
For a pro tip, rub the inside with petroleum jelly or spray it with vegetable oil. This will make removing your planter a breeze, like magic!
If you’re feeling adventurous, try using silicone molds or PVC pipes for something reusable. Additionally, ensure that your molds are designed to hold functional concrete containers as the weight of the concrete can be substantial.
Just keep in mind, the size matters—heavy planters need sturdy molds!
Mixing Concrete

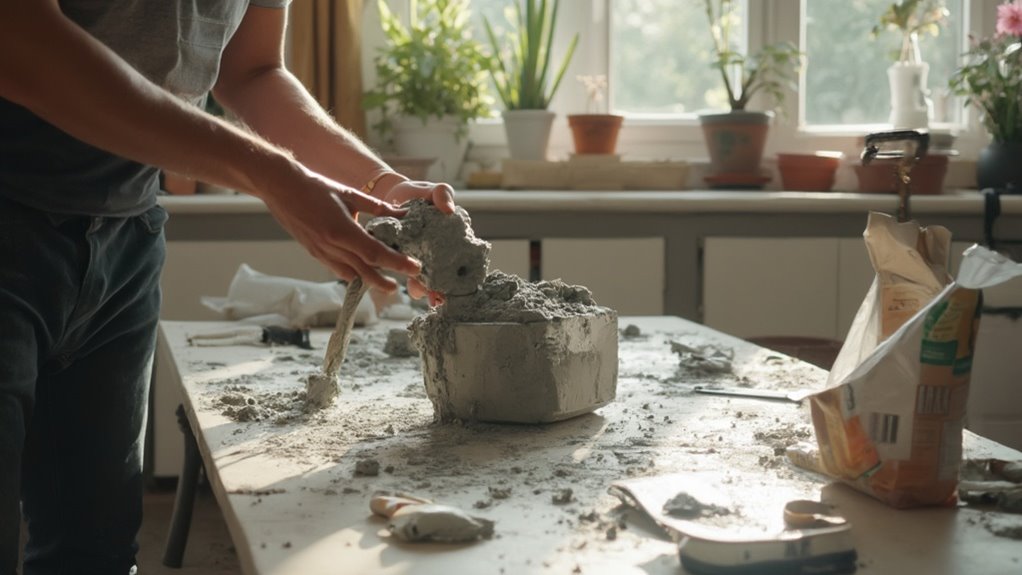
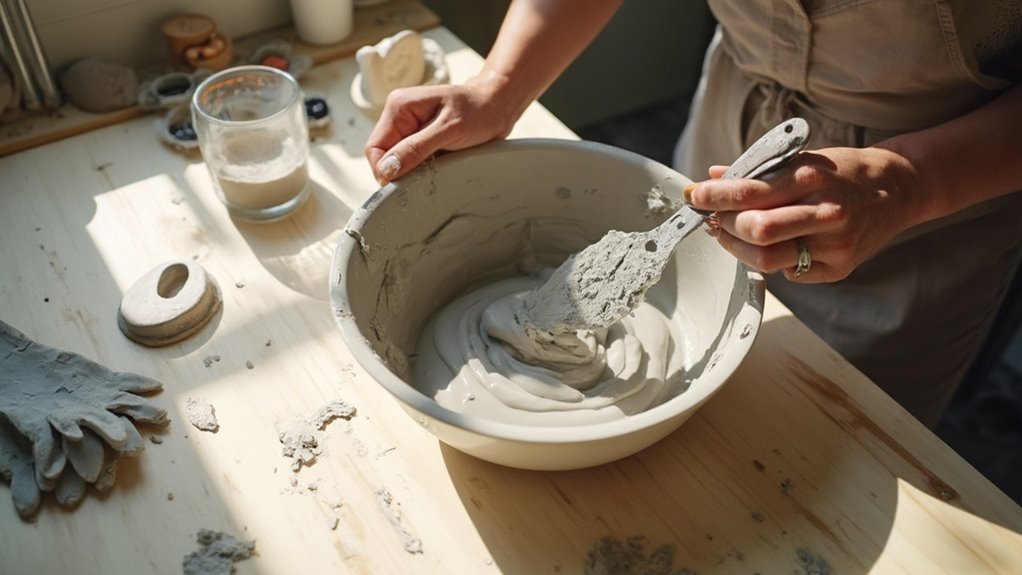
Mixing concrete is where the magic happens in creating your DIY planter.
First, I grab that dry cement mix and measure out two parts to three parts sand. Then, I start adding water gradually, mixing it until I reach that perfect thick oatmeal consistency.
Don’t rush it! Too much water can lead to cracks later, and we don’t want that.
I sift the mix to remove any chunky bits, making it smooth and ready. A trowel works wonders, but if you’re feeling fancy, a drill with a mixer attachment can speed things up. Remember to add colorful pigments to the mix if you want to achieve a vibrant finish.
And hey, don’t forget your safety gear! A mask keeps you safe from dust.
Let’s create something fabulous with our hands, right?
Pouring Concrete
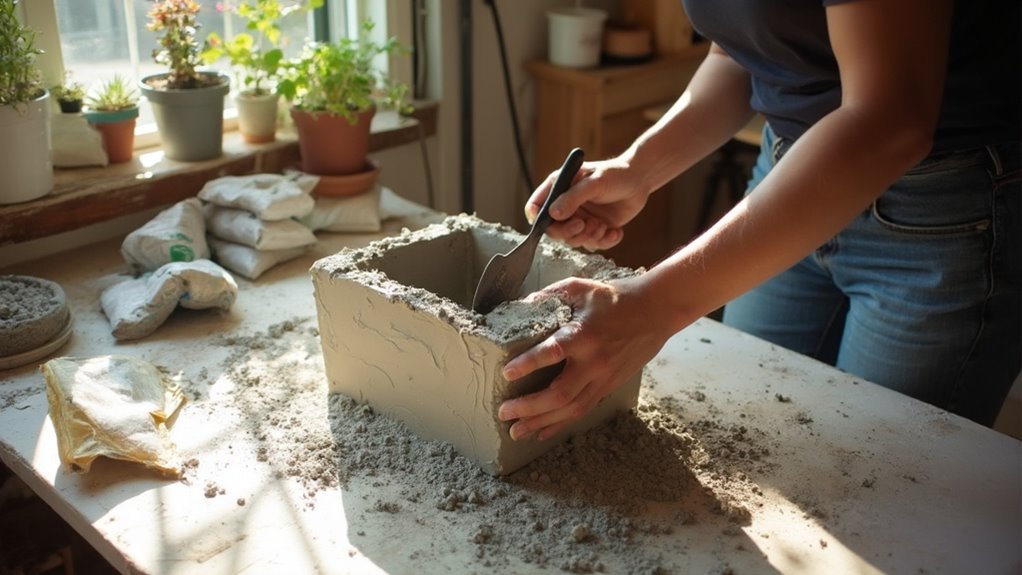
Now that we’ve got our concrete mix ready, it’s time to bring our planter to life.
First, I pour the concrete mix into the mold, filling it up to my desired level.
Then, I carefully place the smaller, greased mold inside, adding some rocks to keep it from floating away like a wayward boat!
Don’t forget to use a straw or chopstick to poke a drainage hole at the bottom—no one wants soggy plants, right?
If needed, I top it off with more concrete, then give the mold a few good taps to release any pesky air bubbles.
With these steps, I’m already feeling like an innovative concrete queen! Adding a stylish concrete planter not only enhances your indoor space but also provides a modern touch to your décor, making it a perfect complement to concrete planters for indoor plants.
After all, we created this blog, Without The Cube, to inspire fabulous interior design.
Compact and Smooth
Achieving a compact and smooth finish is essential for creating a polished concrete planter that stands out in any indoor space.
First, don’t forget to lubricate your mold with motor oil or release spray. Trust me, this little step makes a big difference!
As you pour the concrete, use your hands to push it into the corners, making sure to compact it well. A good trowel will be your best buddy here; it helps spread and smooth the surface beautifully.
And don’t skip the shaking and tapping! This technique removes pesky air bubbles that can ruin your planter’s look. Additionally, using minimalist concrete shelving techniques can enhance your overall design aesthetic in your home.
Curing
Curing is essential for ensuring your concrete planter reaches its full strength and durability. After pouring your mix, it’s vital to let it cure undisturbed for at least 18 hours.
Envision this: your planter is resting in a cozy, level spot, just like it deserves.
For larger pots, I recommend waiting an extra 12 hours after removing the inner form before tackling the outer mold. Trust me, the patience pays off!
As the concrete cures, you’ll see the color even out and lighten, which is totally satisfying. Proper curing techniques will help enhance the overall look and functionality of your planter.
Keep in mind, it might take up to a week for it to dry completely, depending on humidity and thickness. So, grab a cup of tea and let nature work its magic. You’ve got this!
Adding Drainage
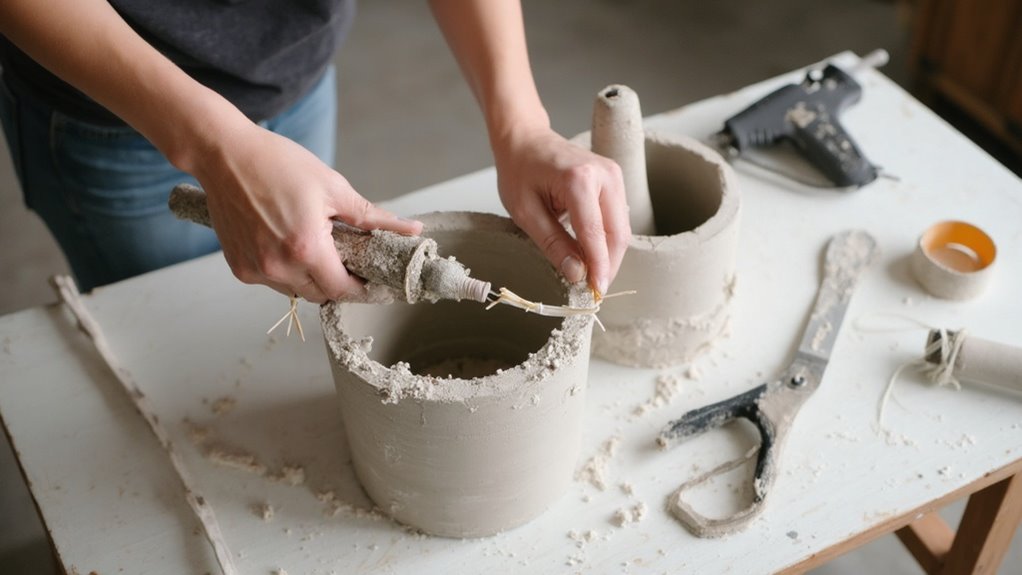
When creating a concrete planter, adding drainage holes is an essential step to guarantee your plants thrive. Trust me, no one wants their beloved plants swimming in a concrete pond!
You can use a simple method like attaching a piece of drinking straw—about ¼” high—at the bottom of your mold with hot glue. It’s super easy!
Or, if you’re feeling fancy, drill a hole and insert a PVC pipe to keep things flowing. Just make sure it’s slightly above the base to avoid a concrete blockage.
Covering the top of your straw or PVC prevents concrete from sneaking in. This way, you’ll have happy, healthy plants without the soggy drama! Additionally, incorporating aesthetic design elements into your planter can enhance the overall look of your indoor space.
Join us at Without The Cube for more innovative ideas!
Finishing Touches

Finishing touches can transform your DIY concrete planter from a basic project into a stunning piece of decor.
First, let’s talk about sanding. I love using fine-grit sandpaper—starting with 150-grit and moving to 240-grit for that silky-smooth finish. It’s like giving your planter a spa day!
Next, a concrete sealer is essential. It protects your creation and enhances its color. Dilute that acrylic sealer a bit at first, then go full strength for the final coats.
Now, if you’re feeling adventurous, consider adding color. Mixing in liquid cement color creates fabulous gradients.
Don’t forget decorative elements! Embedding stones or tiles can make your planter truly unique. Additionally, using a concrete sealer helps to prevent moisture damage and prolongs the life of your planter.
Avoid Overmixing Concrete
Mixing concrete is a critical step in creating your DIY planter, and it’s essential to avoid overmixing to guarantee a strong, durable result. Trust me, you don’t want your beautiful creation to crumble like a cookie!
Aim for a consistency that feels like thick oatmeal or wet pudding. Just mix until everything’s combined; then stop. Overmixing can introduce pesky air bubbles that weaken your concrete. Stylish inspirations can also enhance your overall design aesthetic.
Pro tip? Mix in small batches to keep things manageable. Use a trowel or plastic spoon for a gentle stir—no need to whip it like a cake batter!
And keep in mind, a little vibration or tapping of your mold will help those air bubbles escape.
Let’s craft something fabulous together here at Without The Cube!
FAQ
Can I Use Any Type of Mold for Concrete Planters?
Absolutely, I’ve found that various molds work great for concrete planters. Whether it’s plastic, silicone, or even recycled items, experimenting with different shapes sparks creativity and leads to unique designs I love showcasing!
How Long Does Concrete Take to Fully Cure?
Oh, you thought concrete’s just a quick fling? Think again! It takes about 28 days to fully cure, but factors like temperature and moisture can change that timeline. Patience is key, my friend!
Is It Safe to Plant Directly in Concrete Planters?
I wouldn’t recommend planting directly in concrete planters. They can leach chemicals and affect soil pH. Instead, I suggest using inner pots or liners to protect your plants and guarantee their health.
What Plants Are Best Suited for Concrete Planters?
Did you know that 60% of indoor gardeners prefer low-maintenance plants? I’ve found that compact shrubs like fuchsia and vibrant blooms like begonias thrive beautifully in concrete planters, adding unique character to my indoor spaces.
How Can I Decorate My Concrete Planter After It’s Done?
After finishing my concrete planter, I love painting it with vibrant colors or adding textures. I also incorporate materials like wood for contrast, and sealing it afterward really enhances its durability and aesthetic appeal.
Summary
I’ve just made a beautiful concrete planter for my indoor plants. Research shows that indoor plants can significantly improve mood, making this project not only enjoyable but beneficial for my space.
Creating something like this enhances my home while embracing interior design principles. It’s a perfect way to begin.
I’d love to hear about your own experiences with DIY projects! What have you created, and how has it impacted your space?
If you found this helpful, please share this post on social media to help us expand the reach of Without The Cube!
Leave a Reply