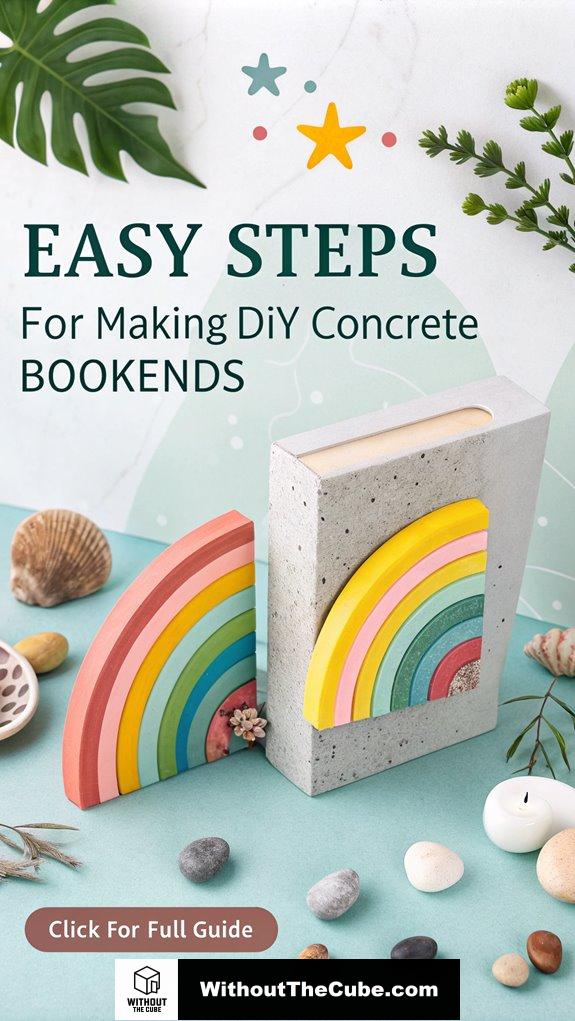
Creating DIY concrete bookends? Oh boy, let me tell you—it’s like a mini therapy session wrapped in a crafty adventure!
First, I cut a mold from some sturdy cardboard (because who needs fancy stuff, right?) and doused it in oil for that smooth release.
Then, I mixed up my concrete, praying it wouldn’t turn out lumpy. I poured it in slowly, giving it a little jiggle to chase those pesky air bubbles away.
When they popped out, oh man, the satisfaction! A little sanding here and there, and voilà! My custom bookends were born, screaming, “I’m crafty and fabulous!”
And here I am, sharing this on my blog, Without The Cube, where I promote superior interior design. Because, let’s be real—our homes deserve better than cookie-cutter decor!
A Client’s Concrete Adventure: Transforming Spaces
Once, I had a client who wanted to spice up their dull bookshelf. We decided on DIY concrete bookends—simple but chic!
After a little trial and error (because who doesn’t love a good design drama?), we ended up with stunning, minimalistic pieces that not only held their books in place but also made a bold statement.
It just goes to show, sometimes the most unexpected materials can transform a space. Concrete isn’t just for sidewalks, folks—it can be a design hero too!
Key Takeaways
- Create sturdy molds using geometric shapes from cardstock or cardboard, ensuring they are secured and treated with a release agent for easy removal.
- Mix quick-dry concrete according to package instructions, achieving a smooth and lump-free consistency for optimal durability in your bookends.
- Carefully fill the molds with concrete, tapping the sides to eliminate air bubbles and ensuring even distribution for a smooth finish.
- Allow the concrete to set partially before demolding, then sand the edges with coarse-grit sandpaper for a polished look.
- Decorate your bookends with pigments, paint splatters, or natural elements like leaves and pebbles for a personalized and vibrant finish.
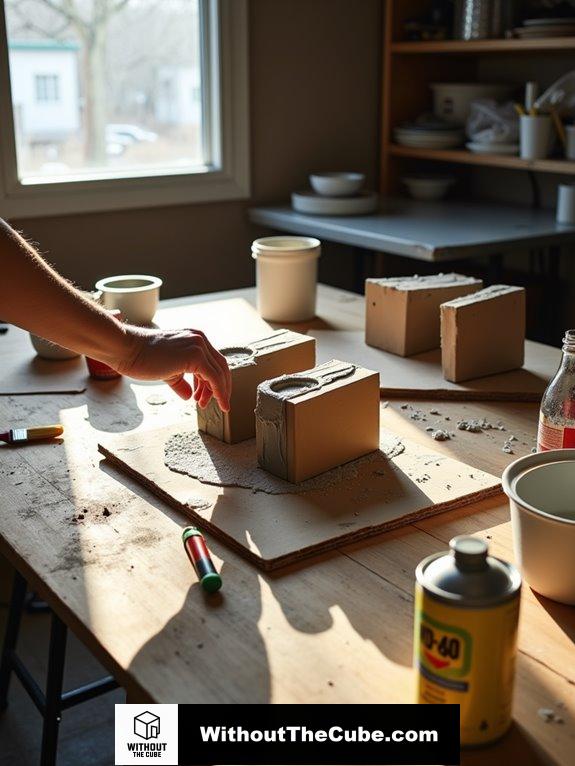
Create Mold Template

When I set out to create my concrete bookends, the first step was designing a mold template that fit my vision. I wanted something unique, so I played around with geometric shapes like triangles and pyramids. A concrete bookend can be a stylish addition to any space, just like a concrete kitchen countertop that adds a modern touch to your kitchen.
Cutting the template from sturdy cardstock or corrugated cardboard was easy, and let’s be real, it was kind of fun! I even used faux LEGO bricks for a smooth release—who knew they’d a second life? After cutting out my shapes, I secured them with duct tape, ensuring no sneaky concrete would leak out.
The key here is to make your mold stable, so it doesn’t flop over when you pour in that fabulous concrete. To achieve this, scoring the cardboard is essential as it facilitates easier folding and stability of the mold.
Ready to get creative? Let’s do this!
Score and Fold Cardboard

Creating the perfect cardboard mold involves scoring and folding techniques that guarantee a precise shape.
First, grab a utility knife and a ruler. Score along each line on the top layer of cardboard—remember, you’re not trying to cut through, just making it easier to fold. Gentle pressure is key here, so don’t go full Hulk on it!
Once you’ve scored all your lines, it’s time to fold. Bend each scored line to shape the cardboard into your mold. Make those folds crisp and sharp; trust me, your bookends will thank you later! This careful process ensures that you can create sturdy bookends using cement bricks as the main material, using proper mold techniques will help ensure a smooth finish on your concrete.
Now, secure those folds with duct tape. Firmly press it along the edges, checking for any sneaky gaps.
Voilà! Your sturdy mold is ready for filling. How exciting is that?
Prepare Mold Interior
To guarantee a smooth release of the concrete once it’s cured, I always start by prepping the interior of my mold properly.
Seriously, a little prep goes a long way! I slather the inside with WD-40 or vegetable oil—trust me, it’s like giving your mold a spa treatment. using a sturdy mold is essential for ensuring the mold’s durability during the pouring process. Remember, using high-quality materials can enhance your styling concepts for the final product.
Next, I verify my mold is clean and dry, ready to rock. If I’m using cardboard, I even brush on a layer of PVA glue for extra durability.
Don’t forget to check for any gaps; we don’t want a concrete leak ruining our masterpiece!
Lastly, I make sure my mold can handle the weight—because nobody wants a sad, crumpled bookend.
Mix the Concrete
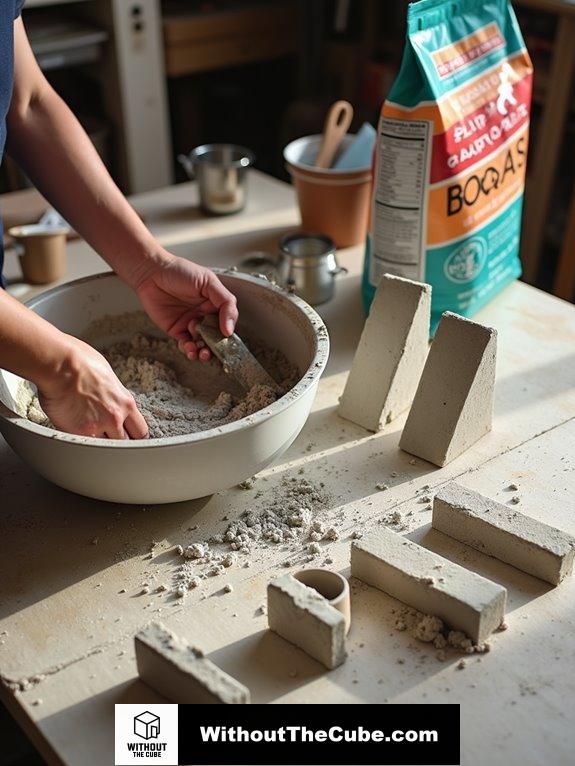
Mixing concrete is a key step that sets the foundation for your bookends’ success.
First, grab a quick-dry, smooth concrete mix—trust me, you’ll thank me later. I love using a Rapid Set concrete mix; it’s like magic!
Now, follow the manufacturer’s instructions for water ratio. Start with less water; we want a thick but pourable consistency, not soup!
Oh, and don’t forget to wear gloves and a mask—safety first, right?
Mix it all up in a bowl, and keep an eye out for lumps. A smooth mix means a smooth finish, just make sure to achieve a medium consistency while mixing to ensure the best results. A concrete mix can significantly affect the durability of your bookends, so choose wisely!
And hey, how cool is it that we can create chic bookends ourselves? Let’s do this!
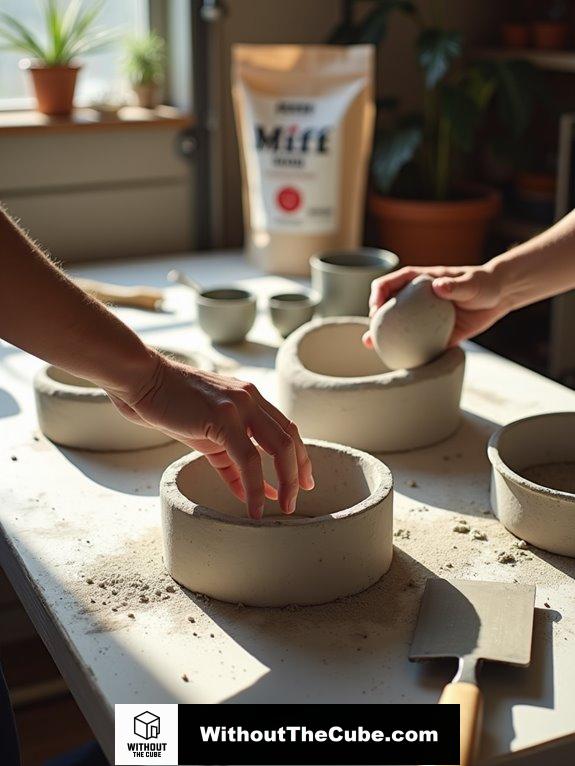
Fill the Mold
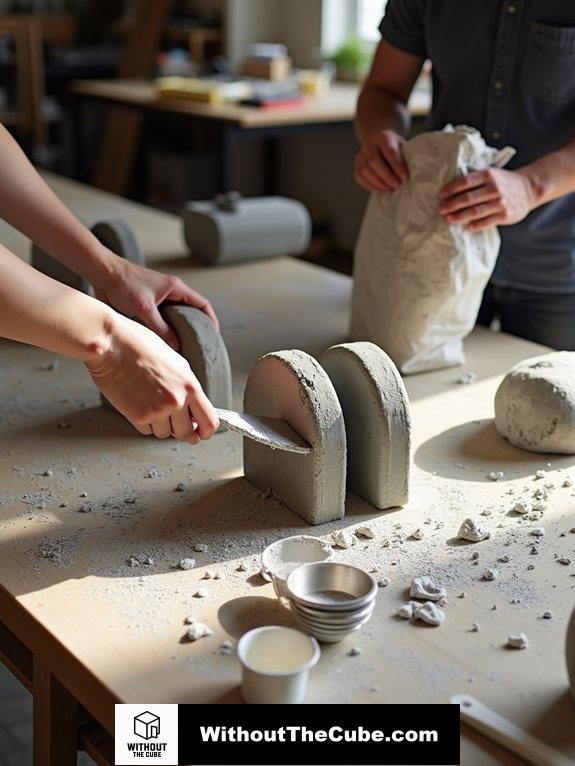
Filling the mold is where the magic really happens!
First, grab your favorite mold—cardboard, plastic, or silicone, and coat the inside with WD-40 or oil. Trust me, you don’t want a concrete disaster when you try to pop them out!
Now, place that mold on a flat surface to keep it steady.
Then, slowly pour in your mixed concrete, using a trowel or spoon for even distribution. Remember, you’ll need about 2.5 pounds of concrete mix for each shape, so plan accordingly! Using the right mixing technique will ensure a smooth consistency in your concrete.
Don’t forget to tap the sides to release any sneaky air bubbles hiding in there!
Fill it to the top and smooth out the surface—no one likes a bumpy bookend, right?
And there you have it! You’re one step closer to creating those fabulous DIY concrete bookends. How exciting is that?
Allow Concrete to Set
After pouring the concrete into the mold, it’s essential to allow it to set properly for the best results. Trust me, you don’t want to rush this part!
Find a flat surface like scrap plexiglass—smooth and steady is key. Keep those molds level to avoid a lopsided disaster.
Place them in a well-ventilated area, but let’s avoid direct sunlight, which can cause uneven curing. The curing process typically takes about 20 hours, so be patient and let the magic happen!
Follow the package instructions, typically about 20 hours. You’ll notice a color change—lighter in the center, darker at the edges—that’s your cue!
And please, resist the urge to poke or prod the concrete. It’s a delicate moment, and we want our bookends to shine.
After all, you’re crafting something fabulous, right?
Remove the Mold
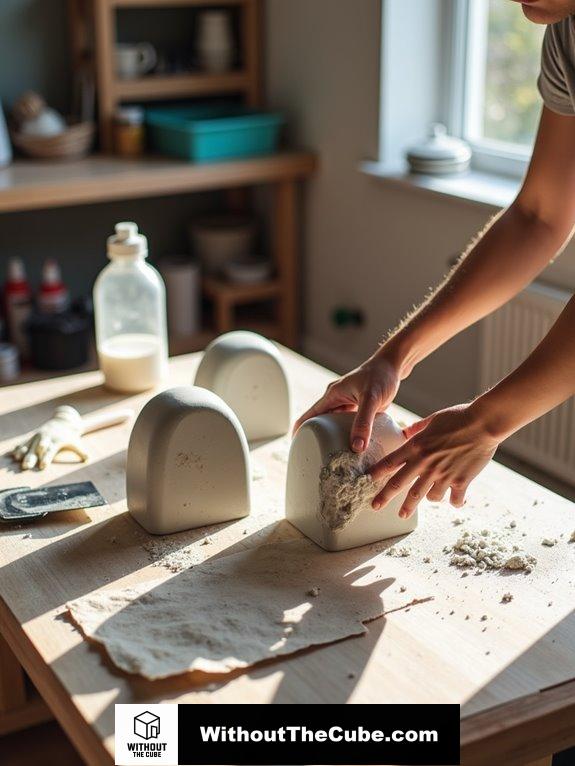
Once the concrete has set and you’re enthusiastic to reveal your new bookends, it’s time to carefully remove the mold.
First, make sure your concrete isn’t fully dry; slightly damp is best for easy removal. I like to use a bit of WD-40 on the mold’s interior before I pour—trust me, it works wonders! It’s also a good idea to ensure that you wear gloves and a mask during the mixing and pouring process to protect yourself from dust.
Gently peel away the tape and cardboard, but if things get sticky, a little water on the cardboard can help.
Don’t rush it; scoring the cardboard edges beforehand makes it a breeze.
And hey, if you see any little texture bumps, just smooth them out later.
With a bit of patience, you’ll have stunning bookends ready to make your space shine—because who doesn’t love a little DIY magic?
Sand the Edges
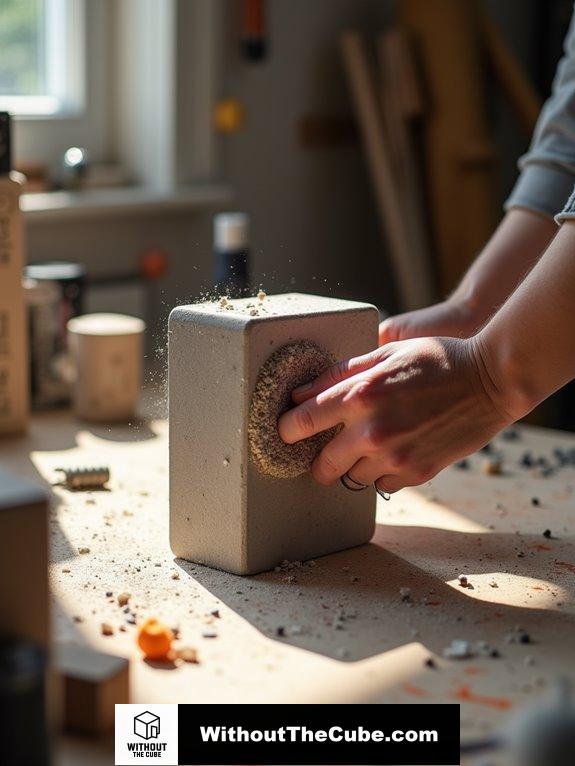
Now that you’ve successfully removed the mold from your concrete bookends, it’s time to focus on sanding the edges for that polished look. Trust me, this step’s a game-changer!
Grab a coarse-grit sanding block or sandpaper—your new best friend. Start by smoothing out those rough spots. Keep in mind, even pressure is key; we don’t want to create scratches.
As you work, switch to finer grits for that ultra-smooth finish. Keep checking for any imperfections; we want perfection here, right?
And please, don’t forget your gloves and dust mask—safety first, darling!
Once you’re done, wipe away the dust, and voilà! You’re on your way to stunning bookends ready to shine. Let’s do this!
Decorate Your Bookends

As you plunge into decorating your bookends, let your creativity soar! This is where the fun truly begins. You’ve got a blank canvas to transform, so why not try these ideas?
- Play with Pigments: Mix in some Direct Colors’ Concrete Pigment for vibrant shades.
- Get Crafty with Paint: A little gold paint splatter can make those bookends pop! Remember, applying two coats of Smooth Finish will help create a smoother surface for painting.
- Unique Embellishments: Use stencils or foam shapes for a personal touch.
Don’t overlook layering your colors and maybe even leaving in some air bubbles for a rustic vibe—trust me, it works wonders!
Let your imagination run wild, and keep in mind, it’s just concrete; you can always start over if you mess up!
Final Drying and Use

After you’ve shaped your concrete bookends, it’s essential to let them dry properly for ideal use.
I like to pop them out of the molds while the concrete’s set but still a bit soft. It makes sanding so much easier, trust me!
Make sure to follow those drying instructions—your future self will thank you.
Once they’re dry, grab some coarse-grit sandpaper and smooth out those rough edges.
Don’t forget to wipe off the dust before you put them to work.
For maximum support, place the biggest flat side against your books.
And hey, always handle them with care!
These beauties are meant to be fabulous, not fragile.
Ready to show off your stylish bookends?
Incorporate Natural Elements Decor

Incorporating natural elements into your DIY concrete bookends can elevate their aesthetic and give them a unique, organic touch.
Don’t you just love when decor tells a story?
You can use branches as molds for a rustic vibe or press real leaves into the concrete for that botanical flair.
How about adding some pebbles or shells? They’ll make your bookends truly stand out!
Mix in some earth-toned pigments to match nature’s palette, and be sure to let your creativity run wild.
Once you’ve cured your bookends, they’ll not only hold your books but also showcase the beauty of nature – creating a mold from cardboard allows for a customizable shape that fits your style perfectly.
Who knew bookends could be such conversation starters?
Let’s create something fabulous together—because life’s too short for boring decor!
Summary
I transformed concrete into stylish bookends in just a few easy steps. It’s a rewarding DIY project that adds character to my shelves, showcasing my creativity and love for books.
I’d love to hear about your own experiences with DIY projects. What have you created that transformed your space?
If you found this helpful, please consider sharing it on social media to help us reach more readers at Without the Cube!
Leave a Reply