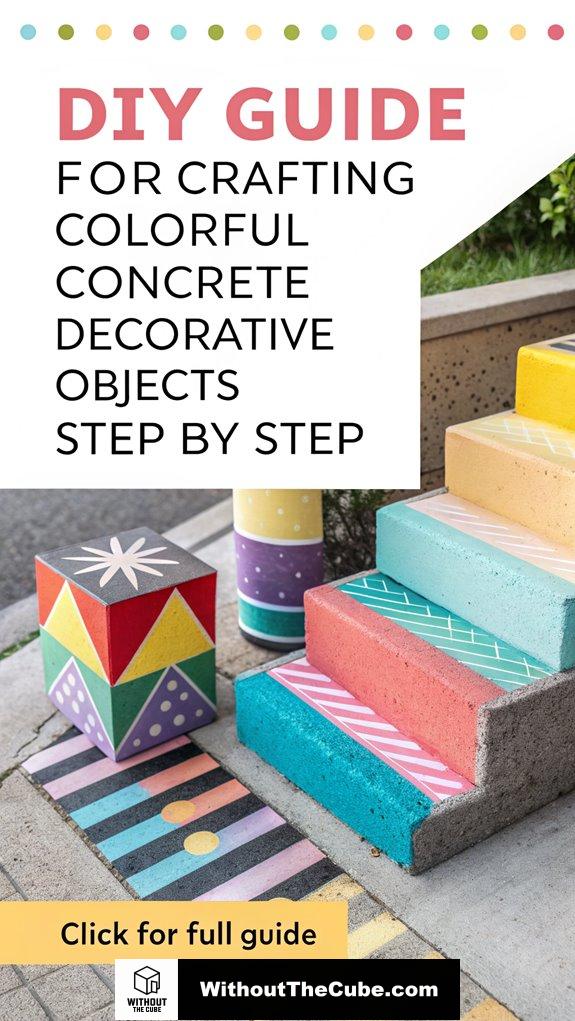
Crafting colorful concrete decor is my guilty pleasure—who knew mixing cement could be so satisfying?
First, I gather my supplies: rapid-set cement, molds, and vibrant color additives. I remember my first project: a mini planter that turned out to be more of a lopsided bowl.
But hey, practice makes perfect, right? I pour my smooth concrete mix into the molds, tapping gently to kick those pesky air bubbles to the curb. After curing, I unleash my inner Picasso with colors and sealants.
Curious about my journey? Check out my blog, Without The Cube, where I share tips for superior interior design!
Real-Life Client Experience: Turning a Drab Space Into a Fab Oasis
Once, I worked with a client who felt their living room was as exciting as watching paint dry. We decided to spice it up with colorful concrete coasters and planters. With a splash of creativity, those boring corners transformed into vibrant focal points. It was a game changer! The smiles on their faces? Priceless. Trust me; good design is all about those little touches that say, “Hey, I care!”
Key Takeaways
- Begin by selecting a clean workspace and choosing your preferred molds for crafting decorative objects.
- Mix Rapid Set Cement with water to achieve a smooth, clump-free consistency.
- Incorporate color additives directly into the concrete mix or apply them post-curing for unique finishes.
- Pour the mixture into molds, pat gently to remove air bubbles, and allow sufficient curing time for durability.
- Experiment with techniques like layering colors or using unique molds to create visually striking pieces.
Materials Required for DIY Projects

When starting on a colorful concrete project, having the right materials is essential for success. Trust me, you don’t want to be halfway through and realize you’re missing something vital—talk about a buzzkill!
First, grab your concrete mix; I love using Rapid Set Cement for its speedy magic. Don’t forget water, a mixing stick, and those trusty disposable gloves. To ensure your project holds up well, consider using a high-quality concrete mix, which can enhance durability.
Now, let’s talk molds. You can get creative with plastic bowls, fabric, or even Pringles canisters—who knew snacking could be so productive? Dollar Tree plastic bowls are a fantastic option, as they make perfect bases for your projects.
For flair, consider faux tiles or natural pigment powders to add some pizzazz.
And of course, a bit of WD-40 or cooking spray helps your creations pop right out of those molds. Ready to get started?
Step-by-Step Crafting Process

With your materials ready, it’s time to get hands-on and bring your colorful concrete vision to life. Let’s plunge into this exciting crafting process!
- Clean your workspace to avoid concrete chaos.
- Pick molds that spark joy—think silicone or those old bowls.
- Mix concrete like a pro; no clumps allowed! Proper mixing techniques will ensure a smooth and even consistency, which is crucial for achieving the desired finish.
- Pour it in and give it a little pat to kick out air bubbles.
- Let it cure, and don’t rush; good things take time! This curing process is essential for strengthening the concrete and ensuring durability.
Once you’ve done all that, you’ll have the foundation for something fabulous.
Who knew concrete could be so fun, right? Just recall, patience is key, and soon enough, you’ll be showcasing your vibrant creations.
And hey, don’t forget to follow us at Without The Cube for more fabulous interior design tips!
Techniques for Adding Color

Color can transform plain concrete into vibrant works of art, making your projects stand out. Trust me, adding color is where the magic happens! Stylish concrete serving trays can be a perfect example of how color enhances everyday items.
First up, you can mix pigments into your concrete before it sets. This gives a uniform look, and it’s fun to experiment with different shades. Just keep in mind, no random pigments—stick to those made for concrete!
If you’re feeling adventurous, try topical coloring! After your concrete is cured, apply dyes or even diluted acrylic paint for a stunning wash effect. Layering colors can create depth—who doesn’t love a little drama? Using a variety of color techniques will allow you to customize your decorative objects even further.
Don’t forget to seal your masterpiece to keep those colors popping.
Drying and Finishing Touches

As your concrete cures, understanding the drying process is essential to achieving the best results. It’s like watching a magic trick unfold—patience is key!
Here’s what you need to keep in mind:
- Temperature & Air Flow: Warmer days speed things up, but don’t get too hot or cracks might crash the party. Ensuring proper ventilation can also aid in achieving a more uniform drying process.
- Curing Time: Each mix is a little diva; some cure faster than others. Concrete as the primary material in your project will also influence the drying time significantly.
- Rapid Setting Mixes: Got a deadline? Go for those speedy mixes!
- Environmental Factors: High humidity? It’s like a slow dance; low humidity? More like a sprint.
- Additives: Calcium chloride can help, but don’t overdo it—precision is everything!
Once dried, release your creativity with sanding and sealing for that ‘wow’ factor!
Creative Ideas and Tips

Now that your concrete has dried and those finishing touches have been applied, it’s time to release your creativity!
How about crafting unique concrete vases using mailing tubes? Pour in that colorful mix, and voilà! You’ve got a chic centerpiece. Mix consistency is crucial to ensure that the concrete adheres well to the molds and retains its shape, and using the right mixing techniques can help achieve that perfect texture.
Or why not create decorative bowls that double as mini planters or tealight holders? The options are endless!
And if you’re feeling adventurous, try the ombre effect by layering pigments for a stunning gradient.
Avoid Air Bubbles in Mix

To achieve a smooth and bubble-free finish in your concrete projects, avoiding air bubbles in the mix is essential. You don’t want those pesky bubbles ruining your masterpiece, right?
Here are some nifty tips to keep in mind:
- Use the Vibration Method: Gently tap the mold or use a vibrating tool for larger projects.
- Slow Pouring: Take your time pouring the mix; it’s not a race!
- Perfect Consistency: Aim for a medium mix—not too dry, not too wet. This helps to ensure that your concrete maintains its strength and durability.
- Careful Stirring: Mix until combined, but don’t overdo it!
- Layer It Up: For tricky molds, fill them in layers and let each set a bit.
Trust me, your projects will thank you!
Incorporate Vibrant Color Accents

Incorporating vibrant color accents into your concrete projects can truly elevate their aesthetic appeal. Who doesn’t love a splash of color, right?
You can bring life to your creations using acrylic or chalk paint to transform plain concrete into a masterpiece. A little trick? Dilute the paint for that effortlessly weathered look. Ready-mixed Stucco Patch is great for adding texture, enhancing the overall depth of your work.
Feeling adventurous? Try layering the paint for a textured finish that’s just begging for attention!
For a bold statement, mix pigments right into your concrete or use colorful molds.
Oh, and don’t forget to seal your work; it’s like sunscreen for your concrete!
With these tips, you’ll turn your concrete objects into vibrant treasures that’ll make your home pop. Let’s get crafting!
Summary
I’ve crafted colorful concrete pieces that truly brighten my space. Each one reflects my creativity and adds personality to my home. It’s a fun project worth trying, so gather your materials and let your imagination guide you.
I’d love to hear about your own experiences with crafting colorful concrete objects! What have you made, and how did it turn out?
If you enjoyed this post, please share it on social media to help us grow our community at Without the Cube!
Leave a Reply