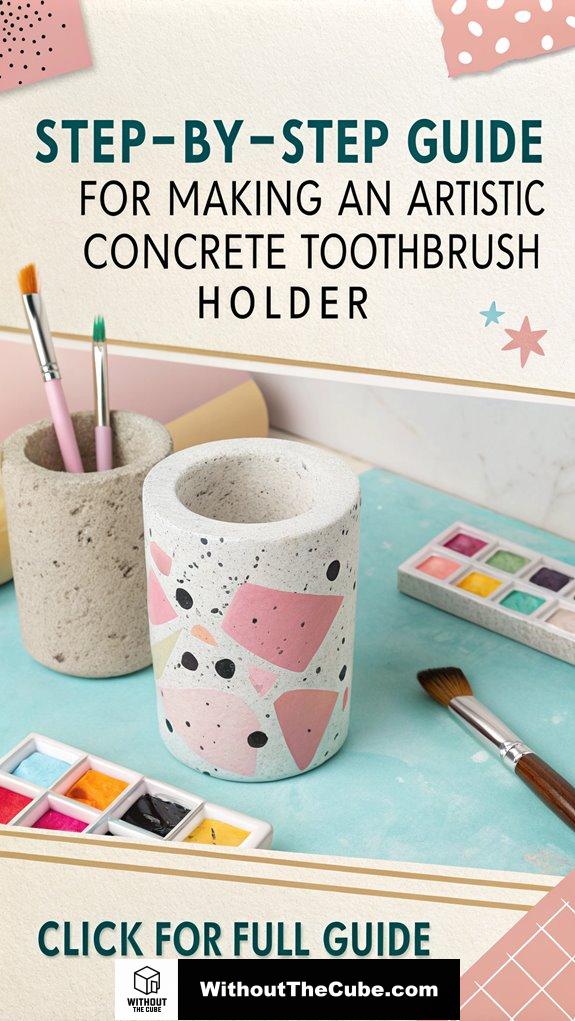
Creating an artistic concrete toothbrush holder? Yes, please!
I mean, who wouldn’t want to elevate their bathroom vibe with a splash of concrete flair?
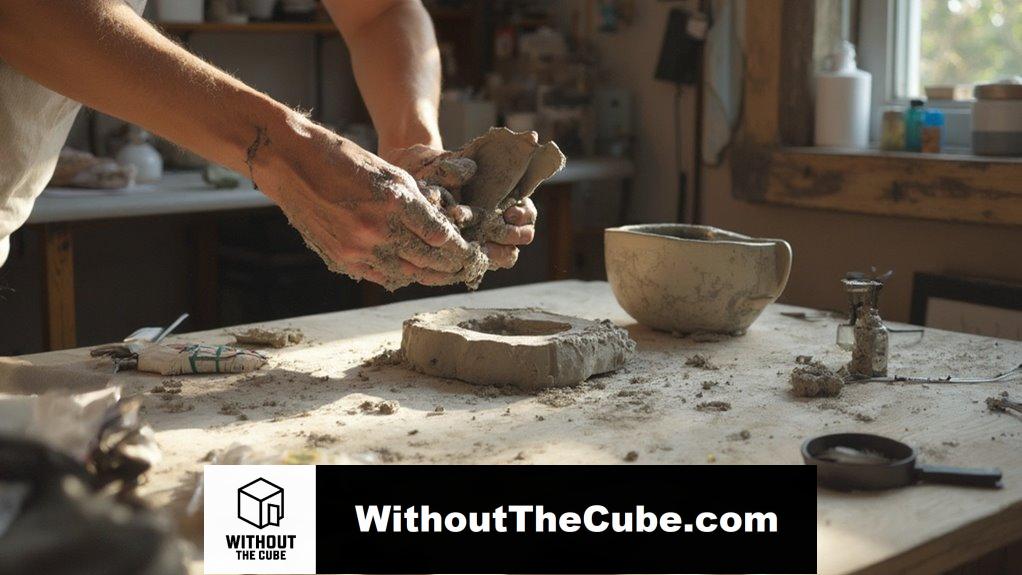
First, I gathered my materials—concrete mix, sand, and gloves. Safety first, right?
Then, I crafted a sturdy cardboard mold. Not my finest hour, but it held up! Mixing concrete is like a science experiment gone rogue—1:2:3 ratio of cement to sand to gravel. I filled up the mold halfway and shook it like maracas to banish those pesky air bubbles.
Once it dried, I sealed it with acrylic. Bam! A unique piece that screams style.
Curious about design twists? Stick around!
—
A Concrete Experience with Client Design
Once, I worked with a client who wanted a chic yet functional bathroom. We decided on a concrete toothbrush holder, but we needed a twist.
I suggested adding a vibrant splash of color on the inside. The result? A stylish contrast that made a bold statement.
This project not only transformed their space but also sparked conversations. It’s all about creativity—don’t be afraid to think outside the box!
Remember, every detail counts in superior interior design.
Key Takeaways
- Create an accurate cardboard template for your mold to achieve the desired shape and style for the toothbrush holder.
- Mix concrete using a ratio of 1 part cement, 2 parts sand, and 3 parts gravel, ensuring a consistent and strong mixture.
- Fill the mold halfway with concrete, compacting it and shaking to remove air bubbles for a smooth surface.
- Apply multiple thin coats of acrylic sealer after surface preparation to enhance durability and protect the finished holder.
- Add unique textures and artistic designs during the filling process to personalize your concrete toothbrush holder.
Materials and Equipment Needed

To create your artistic concrete toothbrush holder, you’ll need a few essential materials and equipment.
First, grab your concrete mix, sand, and water, plus some pigments for those fabulous color choices. The handmade concrete toothbrush holder is designed to fit Quip toothbrushes and most standard toothbrushes, adding a stylish touch to your bathroom. Concrete jewelry holders can also enhance your space with their unique aesthetic.
Don’t forget safety precautions like gloves and a mask!
You’ll also need molds, sandpaper, and a sealant to finish it off.
Let’s get those creative juices flowing—your bathroom will thank you!
Preparing the Mold

With the materials gathered, it’s time to focus on preparing the mold for your artistic concrete toothbrush holder.
Start by creating a cardboard template—perfect for mold design—making sure everything’s trimmed for template accuracy. A well-designed mold ensures that your final product has the desired shape and fits your vision perfectly.
Secure it with a bit of tape and glue, then support it with sand. A mold made from cardboard is not only easy to create but also allows for a custom design that suits your style.
Trust me, a solid mold is the foundation for your stylish creation!
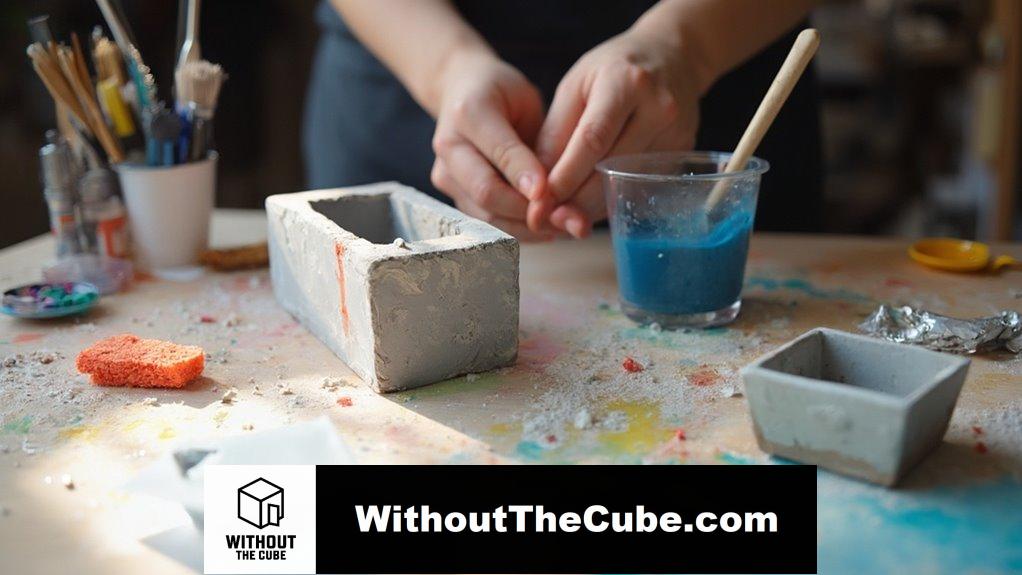
Mixing the Concrete

Mixing concrete is an essential step that sets the stage for creating your artistic toothbrush holder.
I love using a sturdy hoe to blend my mix ratios, like the trusty 1:2:3 for a solid foundation. To achieve the best results, it’s important to choose the right mixing techniques that suit your project.
Employing smart mixing techniques, like gradually wetting the mix, guarantees consistency. A lower water-to-cement ratio results in stronger concrete, which is crucial for durability.
Keep in mind, safety first—gloves on!
Who knew mixing could be this fun? Let’s get that creative energy flowing!
Filling the Mold
Filling the mold is where the real magic happens in creating your artistic concrete toothbrush holder.
I start by pouring in the concrete, filling it halfway. Shaking the mold helps eliminate air bubbles, and I layer it, compacting as I go. Utilizing various techniques can enhance the overall design and lead to unique concrete textures that elevate the aesthetic of your holder. Proper safety gear is essential during this process to ensure a safe and enjoyable mixing experience.
Here are some tips for air pocket prevention:
- Use a high-quality mix.
- Pour in small amounts and tap the mold.
- Mix thoroughly, but don’t overdo it.
- Keep temperatures low.
In addition, incorporating creative ideas in your design can help mask any imperfections that may occur.
Let’s get that creative project buzzing without the bubbles!
Adding Decorative Elements
Decorative elements can transform your artistic concrete toothbrush holder into a unique piece of functional art.
Think about your color selection—vibrant hues or soft pastels can make a big impact! For texture application, use mats or coatings to create cool designs. Additionally, consider using a material like cementitious acrylic resin composite to enhance both durability and aesthetic appeal. Mixing textures adds depth and style, making your holder not just practical, but a true conversation starter. Incorporating unique concrete designs can further elevate the visual interest, setting your toothbrush holder apart from ordinary options.
Sealing and Finishing Touches
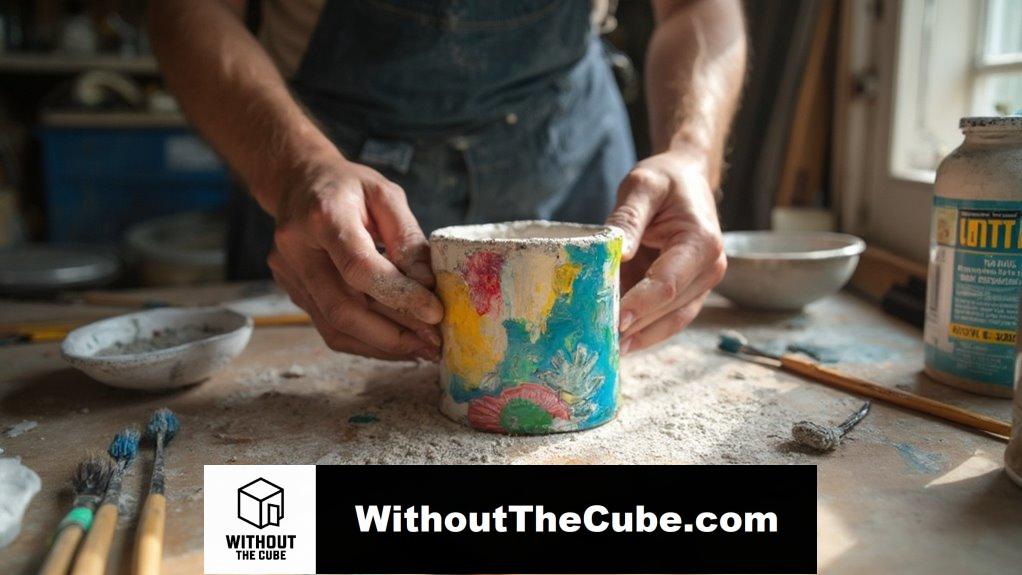
After adding those decorative elements to your artistic concrete toothbrush holder, it’s time to focus on sealing and finishing touches to guarantee it not only looks great but also stands the test of time.
Start with surface preparation—clean it up and etch a bit. This step is crucial for ensuring that the sealer adheres properly and provides a durable finish.
For sealer application, I love using acrylic sealers. Just keep in mind, multiple thin coats work best for that stunning finish! Your creation deserves it! Additionally, using a clear Matt Medium can encase the entire piece, providing an extra layer of protection.
FAQ
How Long Does Concrete Take to Fully Cure?
I’ve found that concrete takes about 28 days to fully cure, which is essential for achieving maximum strength. Curing time can vary based on temperature and humidity, so I always monitor these factors closely.
What Type of Concrete Mix Is Best for Decorative Projects?
When I immerse myself in decorative projects, I prefer fiber-reinforced concrete for its durability and self-consolidating concrete for complex designs. These concrete types create stunning decorative finishes that truly elevate any artistic endeavor I pursue.
Can I Use Food-Safe Sealants for My Toothbrush Holder?
Envision your toothbrush holder as a ship sailing in a sea of cleanliness. I’ve found that using food-safe options for sealant application keeps my vessel afloat, ensuring safety while steering through the waters of daily use.
How Do I Clean My Tools After Working With Concrete?
After working with concrete, I always use effective cleaning techniques. I wash my tools with warm water and mild detergent, ensuring proper tool maintenance. This keeps them in great shape for my next creative project.
What Should I Do if My Concrete Cracks During Curing?
When cracks appear during curing, it’s like a storm cloud over my project. I focus on crack prevention and apply repair techniques like injection or resurfacing to restore integrity and keep my vision intact.
Summary
I’ve created an artistic concrete toothbrush holder that adds style to my bathroom. A tidy space can boost relaxation, so this project not only serves a purpose but also sparks interesting conversations. I’m excited to see what you all create!
Share your own experiences with organizing your bathroom! What projects have you tackled to enhance your space?
If you enjoyed this post, please share it on social media to help us reach more readers at Without the Cube!
Leave a Reply